This blog was created to help those wanting to make best use of their WGR614 WiFi Router. The configurations that I mention below works with BSNL and Airtel connections (India). However, it can certainly work well with any PPPoE based ADSL connections.

Amazon links to items if you plan to buy them

Search the site

Google
 

Friday, January 18, 2008

Why write this Blog

Hi,
This blog is primarily for those who want to make best use of their NetGear WGR614 routers. I bought this router at Chennai, India for Rs. 2000 (its much cheaper now, somewhere in the Rs. 1500 range).
Background:
Why did I purchase this router?
One main reason why I purchased this router was that, it was Wifi capable, so that I can wirelessly use my internet. This router, however does not have ADSL capabilities like DLink, UTStarCom, Huawei modems. This is a plain Wifi router, but you can do some fancy stuff, if you can correctly configure it.

Why did you purchase this router, when you get one with ADSL capabilities for an extra Rs. 1000?
Well, there is just one reason for it. I was planning to use it with my YouTelecom Cable modem. An ADSL at that time seemed not a requirement. Also, this would make it ISP agnostic, as any modem that has
  • ADSL/Cable modem connection and
  • has an ethernet port
can be connected. However, this router can detect PPPoE, PPPoA connections. Hence, you can get the cheapest modem that the ISP provides, connect it to the WGR614 router and configure it for your needs. More importantly, one big reason why I bought this router was that, the default modem supplied by ISP (such as BSNL who provide Huawei or UTStarCom modems) is that they cant be configured to the level WGR614 can be, explained in this blog , although I would assume that over time that would get better.

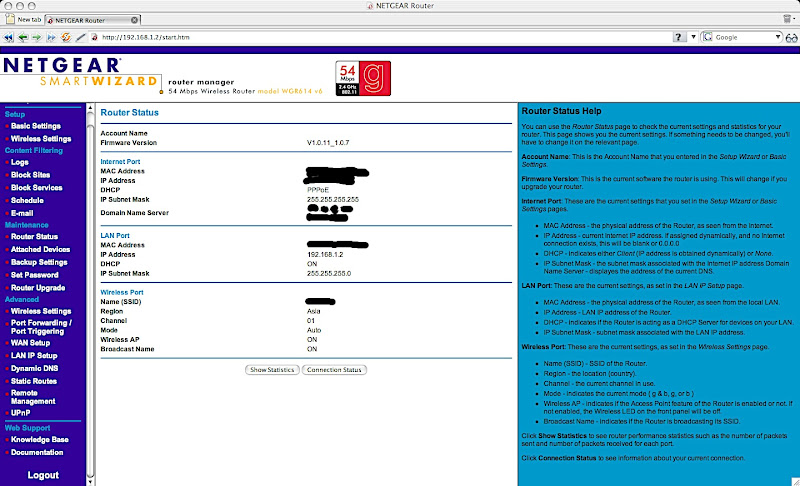
Now that I have explained why I bought this router, let me dwelve deep into how to configure this router. Before doing that, I will start explaining what the router can do, and what not:

What the router can do?
1) Dial the PPPoE connection (This is much more a basic requirement, because if this is available, WGR614 has the public IP on its WAN interface. This allows you to take advantage of features in it. If this is not possible, then stuffs like port forwarding, port triggering is not possible, if the modem provided by ISP does not support it).
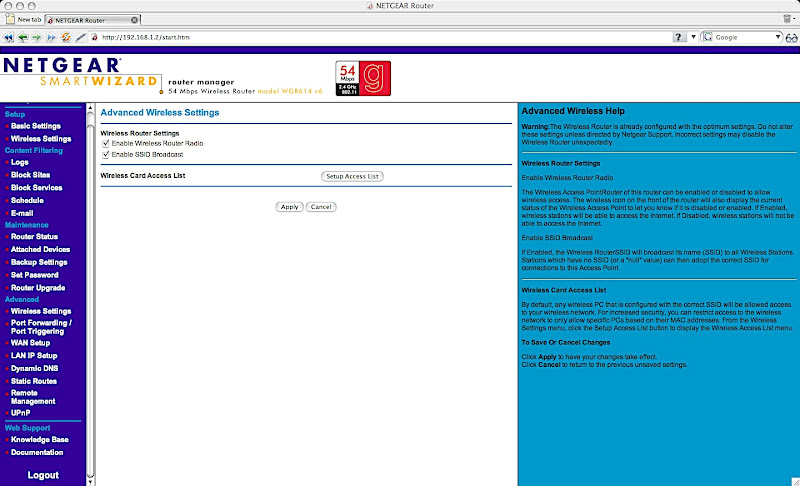
2) Wireless with uPnP. It supports .11g standard.
3) Share that internet connection wired with 4 devices with a switch.
4) Dynamic DNS, DoS prevention, a firewall and a few more.
Please write all your comments and questions in this thread.

Disclaimer
I am NOT responsible if your router goes bad(or something similar) after trying out. By trying out what I wrote, you agree that I m in no way liable. There may have been some errors and omissions in this post beyond my knowledge and I regret for them.

Basic Setting

Screeenshot:


This is the first screen you would be seeing when you login. In an unconfigured modem, when you login you will not see this screen. Instead you will be greeted with a screen, which will tell that it will intelligently try probing your network to see what it can be configured as. This did not work for me properly though, so I decided to play around myself. In this screen basically you enter your connection as PPPoE and username and password. The modem supposedly detects the VPI /VCI (whatever), so you need not worry about those numbers. Remember to set IP Address set dynamically and DNS server set dynamically.

Note on DNS: Sometimes, if your ISP's DNS server is flaky (BSNL users experience this often), you can set this to some opendns DNS IP. More details on opendns at www.opendns.com. Also remember that, any third party DNS is expected to be definitely slower than your ISP's DNS (unless your ISP's DNS sucks - in which case it makes perfect sense to switch to OpenDNS).

Wireless Setting

Screenshot

When unconfigured, your modem has no wireless setting initialized. You can choose WEP and WPA-PSK. WPA is much more secure, but it seems that WEP is more popular and works seemlessly across different platforms. Remember that WEP 48bit (aka WEP 64 bit) is quite insecure and there are stories of able to crack it easily. Anything below WEP 128 bit is same as unprotected network (although thats not true, for your safety, consider so :) ).

Router Status

Screenshots

If everything is fine, you should see similar screen. I have blanked out sensitive details. In your modem, you should be able to see similar settings.

Set Password

Snapshot

Continuing to keep the default username and password is a foolish idea. As any other computing device, change your passwords regularly.

Advanced Wireless Settings

Screenshot

Remember that if you require extra security, you can setup access list. Only those devices which are in the specified list of MACs will be able to access the network. This is a nice idea, but does not work when your friend or relative comes home and wants to access internet. You can rather give him your WEP key rather than going to the modem and painstakingly add his MAC to your white list. I donot have it enabled, as it ended up to be more hassle than security. If new users in your wireless network is not frequent, this is a great option.

Port Forwarding / Triggering

Screenshot


For port forwarding to work, remember that you should know which IP you will forward to. This screen does not require a reboot, hence works adhoc. But remember that if you want to persist opening a port, you should address reserve the IP to the system to which you want to forward the port and set that here and save it. One other thing here is that, you can punch open series of ports or a single port.

WAN Setup

Screenshot

Some people prefer to tweak the MTU size for their ISP, although I have never done :). As a security measure, its good not to expose your modem to PING requests. Also unless you are sure what you are doing, never disable the Stateful Packet Inspection (SPI) firewall.

Lan Setup

Screenshot

Setting up your LAN is the next important thing. This screen lets you setup the IP address of your Router. In my setup, I set the modem(ADSL) to use the WGR's DHCP to obtain its IP Address. Hence it was quite obvious that I always wanted to keep static (internal) IP for the router. I have also reserved a few IPs for my desktop/laptop etc, so that when I do port forwarding, I always forward to the device of my choice. The laptop/desktop always does DHCP and obtains the same IP because of address reservation. Remember to apply your settings if you change something here.

Dynamic DNS

Snapshot


The router provides a Dynamic DNS facility, so you can access some site like yourname.dyndns.org and be able to ping your router (of course in my case the router wont reply back, since it drops all ICMP ping packets). If you have specific ports open (lets say you open 2020), then you can acess it by http://yourname.dyndns.org:2020/
This helps you avoid asking someone within the router's local network to provide you the public IP that the router obtained when it connected to the ISP.

Remote Management

Screenshot

You should always have remote management disabled unless you are sure what you want to do. I set the extra clause that only people from inside the LAN can alter any settings on the modem. Since I have access to my desktop through VNC, if there really be a need to do so, I can do that by first VNCing to my desktop and then accessing the modem's console. You can do a similar setup like that.